Monday, April 14, 2014

Late Period Blue Wool Waistcoat/Jacket

***
(Note: This post was compiled before I realized that Blogger had a secret "enhance" feature that it automatically applied to all your photos.  I've since figured out how to turn it off, but I apologize for the crazy saturation and vignetting on some of the photos below.)

Phew!!! So I finally finished the blue Elizabethan/Jacobean waistcoat I started planning...what, three years ago? Yikes...!


But it's done and for the most part I couldn't be happier!
This project started out as a quick test piece to cut my historical sewing chops before I dove into an Elizabethan fitted gown.


But eventually it grew into it's own thing as I realized I would need more and more pieces to achieve the correct silhouette.


Already documented are a set of grey linen bodies and a heavy wool petticoat, but before starting on the jacket I also completed a high-necked linen smock and brown linen skirt. The skirt is cartridge pleated, with the front 8-10" left flat. It was constructed using the same method as the petticoat and represents more than 2,160" of hand sewing.  Historically accuracy be damned-- I am saving my wrists and sewing my next skirt by machine!
(EDIT: Since starting my next skirt I find the seams don't lay as flat and so I'm back to hand work.  Drat)


I highly recommend finishing all supporting layers before starting on the jacket.
The skirt in particular threw up a few hurdles.
The brown skirt is actually two skirts (with an integral under-skirt of stripped linen sewn to the same band) and each is made up of 4 shaped panels with a bottom circumference of just under 240".  It was very, VERY heavy.  This necessitated additional padding in the bum roll, which in turn pushed up the waistline, which in turn meant adjustments to the waistcoat.

To start I made up a mockup based on the pattern from The Tudor Tailor, adding about 3" to the bottom so as to more closely approximate the look of the Wenceslaus Hollar print above (this also pushed the aesthetic more firmly into the 17th century, but I wasn't too concerned with that).


At this point I had already decided to forgo closures along the front since I'm trying to drop some weight and didn't want to have to re-do them on the off chance that I was actually successful. Instead I'll just be pinning the front closed for now. This meant the front ends didn't need to meet up exactly and so I was just concerned about the fit through the back and sides.

Due to the additional bulk of the skirt I ended up adding at least 1/2" to the slash for the back godet and 1/4" along the sides.  I also added two additional godets into the side back seams.


Happy with the fit of the mock-up it was time to cut the fabric!

The waistcoat is made from a dark blue wool lined with navy blue linen.  Both are from B.Black and Sons, but I lost all the info on the type and weight so I don't know much more than that...
The wool is flat-lined (through the body only) with a medium weight natural linen.

And here is where I made my first mistake...

The wool was very prone to shifting and stretching so I knew just sewing along the edges was probably not going to work (especially when it came to inserting the godets). I decided to use large temporary pad stitches to secure the pieces together.


Great idea!
Except, when I turned the pieces over the wool had --no surprise-- shifted and bubbled.


So I ripped everything out and this time worked with the wool on top, constantly smoothing as I went (and occasionally using the iron as well).  I used my handy butterfly clips to keep the pieces lined up (I like them more than pins for this sort of thing) and lots of fabric weights.
I pad stitched around the edges and about as far up as the slits for the godets along the bottom.


Much better!
Then I did the same for all the godets, wings, and collar (but not the sleeves)


Now for the point of no return: Cutting the first slash!


The slashes have a seam allowance of 1/2" at the bottom, tapering to almost nothing at the top.  So I marked the bottom seam line...


...and then pressed the seam open (removing some the pad stitching as needed).
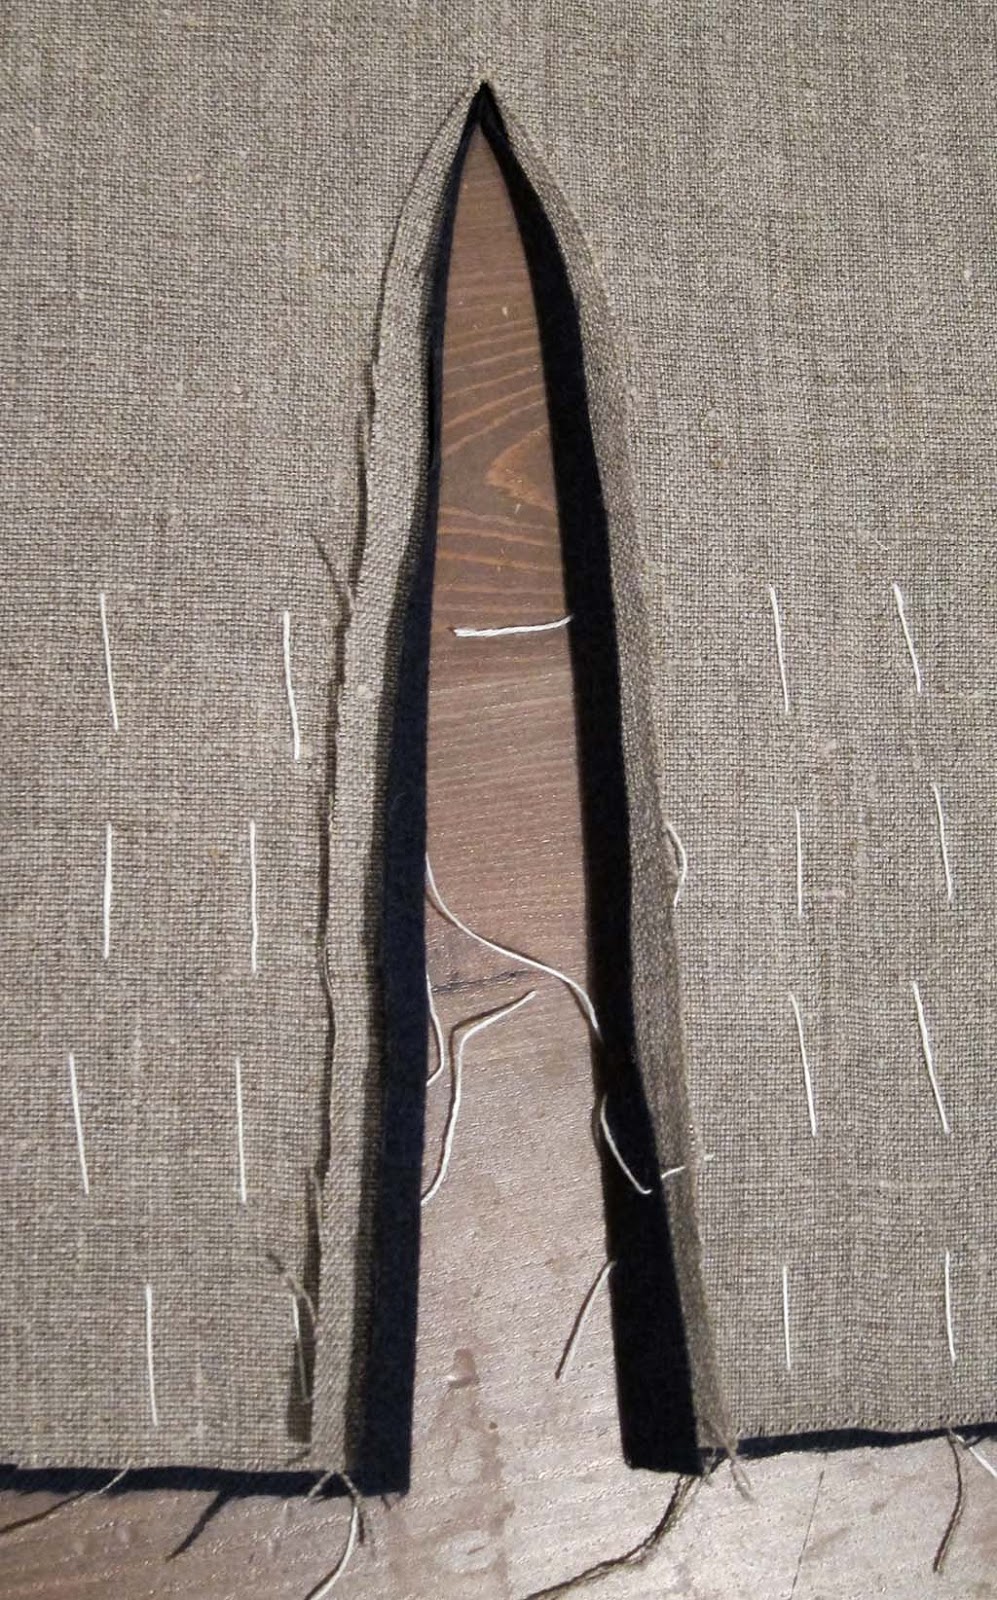

Then the seam is stitched down with a running stitch, being careful only to catch the interlining and not the outer wool fabric.


A tiny whip stitch is used to secure the fabric at the point.


Now it's time to add the godet.  In order to line it up properly I returned to my pattern piece which had the 1/2" seam allowances marked.  From the back of the godet I passed a pin through the fabric and pattern piece so it emerged just above where the two seams intersect.


With the pin still half-way through the fabric the pattern is removed and the pin inserted just above the point of the slash, thus ensuring the godet is perfectly aligned!


Pull the pin through and take two tiny stitches in place, anchoring the godet.
The godet is then pinned in place.


Working from the point, the godet is top-stiched down using a spaced backstitch.


Then I whip-stitched around the point to keep any stray edges from fraying.


Insertion complete!


The godet was then hem-stitched to the interlining around the outside.
The same method was repeated for all the godets, except along the two set into the side seams, where the seam allowance did not have to be graded (and was just 1/2" from top to bottom).


(NOTE: The godets were added before the body piece were joined together, except for the two along the side seams, which were added after.) 

And that's it! Body done!


Now it's on the the sleeves...

Here is where I really started to diverge from the instructions in The Tudor Tailor and instead began to follow some of the construction methods in "17th Century Women's Dress Patterns".  For the sleeves I more or less adopted the approach used for the Layton jacket.


The sleeve and lining are made up separately.
Now this is the point were I should be grading and clipping my seam allowances...but I HATE clipping.  I know it's important for seams to lay properly, but also I know that the second I clip a seam will be second before I realize I need to tear it out (thus making adjustments impossible).
So --with the reasoning that Layton jacket didn't have clipped seams either-- I opt to just press the bejezus out of them instead!


With that done the lining is tuned inside out and placed within the sleeve (wrong sides facing).


The raw edge around the cuff are turned in, pinned down, and then ladder/draw stitched together.


The lining is then pinned into the sleeve head, and then stitched into place with a 1/4" seam allowance.


The sleeves were also slightly altered from the original pattern.  They are about 2-3" longer, thus creating the rolled back cuff pictured above.

Sorry for the lack of photos for this next bit...
But then the wings and collar are sewn to the body (right sides together) with a 1/4 seam allowance.

Next it's time to set the sleeves into the body.
I'm probably going to go into slightly more detail here than is needed because I had a really hard time trying to figure out how to set a sleeve for the first time! Hopefully it's not too wrong...
(Note: depending on how thick your fabric is you may want to trim down the seam allowance of the interlining before setting the sleeves to reduce the bulk around the armhole)

First the sleeve and body are folded in half, with the shoulder point and bottom marked on each.


Then the two marks are lined up and pinned together.


From there, the bottom half of the sleeve is pinned to the body (until reaching the seams).


Now it's time to start gathering the remainder of the fullness into the sleeve head (which is where you want it for arm and shoulder movement). I just sectioned of the remaining fabric into halves, then quarters, etc.
To do that I would typically pinch the section I wanted in half and then just run a pin though it.  I like this method because it is more precise and mathematical, but you could also just run a gathering thread through the sleeve head instead and eyeball it.


Now with the sleeve pinned into place it is sewn down with a 1/2" seam allowance.


You'll probably want to try it on at this point and see how it fits.
(Note: always try things on with all the undergarments you intend to wear.  I was going to tear my first sleeves out because they were pulling at my shoulders in a weird way...but once I got the corset on my posture improved and the problem seemed to resolve itself).


Now it's time to line jacket!
The lining is made up the same way as the body... except the sleeves, which have already been inserted (In retospect, you might want to START by making up the body lining to get a handle on inserting the godets).

When it comes to inserting the lining, I used a combination of techniques as outlined "17th Century Women's Dress Patterns", so hopefully this won't be too confusing.

First the lining is pinned to the body (Right sides together) along the top/collar section only. The lining is sewn down with a 1/2" seam allowance, turned and pressed.
(the front raw edge is visible in the photo below)


Then the seam allowances for the armhole is folded under.


The lining is then placed over the sleeve, lining up with the seam allowance of the sleeve and pinned into place.
(Note: the seams of the sleeves should be pressed towards the body before the lining is pinned down).


Then the lining is ladder stitched to the sleeves.


And Ta-da!  Lovely finished sleeves!


Next the front edge is folded under, pinned/clipped, and ladder stitched together (though it could also be top-stiched if you prefer). I like to leave a larger seam allowance here (1-1 1/2") to make the front edge more substantial.


Try it on one more time to make sure everything is sitting pretty...


Now, what I intended to do was fold the bottom under in the same way that I did the front, but the bulk at the godet seams caused the fabric to warp in a weird way and it refused to lay flat.
So I made some some 3/4" bias tape from same navy blue lining fabric and bound the bottom edge instead.

Lastly, I used a left over piece of grey linen (from the corset) and whipped up a quick apron...and we're done!


As to the accessories...

The lovely (and ridiculously massive!) straw hat was found on Etsy.  It's vintage 1940s, and had several large flowers before I modified it.
The blackwork coif is by the marvellous Bonnie Beglin, of Thistlebees.


And on course every gal needs a pair of red shoes!  Mine are the Stratfords, by The American Duchess.


Resources & Materials

Pattern:  
- The Tudor Tailor (book and/or ready-made pattern)

Fabric:
-Blue Wool and Linen from B.Black and Sons
-Muslin & Linen scraps for mockup 

Thread:
-Dark blue cotton thread for machine work
-Various shades of blue silk thread for hand sewing
-Grey linen thread for hand sewing

Other Supplies:
-Swedish pattern paper from Amazon. (This stuff is great! You can iron it!)
-Pattern weights
-Purple vanishing fabric marker
-Blue washable fabric marker
-3/4" Bias tape maker
-Small bulldog clips


Friday, November 1, 2013

Grey Linen Corset/Bodies

***
My take on the Pfalzgrafin Dorothea Sabina von Neuburg corset/bodies (below), but with the waist tabs left off and adapted for front lacing.


This corset basically started life as a glorified belt.
After finishing some very heavy skirts for my late 16th/early 17th century outfit I realized that I was going to be putting too much weight on my waist and hips (and that this would lead to misery later).
In order to distribute the skirts more evenly I decided to attach them to a corset --as would have been done in period-- thereby shifting the weight from my waist and lower back to my shoulders.  All of my custom corsets were fully boned and didn't allow for the addition of eyelets at the waist, so clearly it was time to learn how to sew a support garment!

Picking a pattern was fairly easy. There are only a handful of extant bodies from this period, so my choices were pretty limited to begin with. I knew I wanted a front lacing corset for ease of dressing and undressing, but since this was my first attempt at a structured garment I also wanted it to be as simple as possible in case things went horribly, horribly wrong.  
This eliminated Queen Elizabeth's 1603 effigy corset, since the boned tabs seemed too difficult and I wanted integral shoulder straps to deal with the weight issue mentioned above.  So in the end I settled on what was really my only other choice: the 1598 Dorothea bodies (left).  I picked the version found in The Tudor Tailor, though there is a slightly different  pattern in Janet Arnold's Patterns of Fashion, which I believe is slightly closer to the original.

I made the necessary adaptations for front lacing by sewing up the back seam and switching the wooden busk for lacing edges...which was a bit tricky given the brassier-like "cup" boning pattern.  I don't have any evidence for this type of pattern being used with a front closure in the period, but this whole endeavour is a bit of an experiment anyway and being underwear it's an anachronism that no one will actually see.
Certainly I can appreciate why this pattern wouldn't typically be used with front lacing, since the "girls" tend to look a bit wall-eyed the more the is corset is undone.

The final garment is fully boned in front with 5mm synthetic whalebone and two 7mm spring steel bones on either side of the lacing edge.  The back is not currently boned, however boning channels have been sewn for possible conversion to back lacing later (and to keep the fabric from shifting).

Now on to the construction!

First things first: The mockup!  
I won't go into a lot of detail here, except to say don't skip this step. I ended up making a few simple (but significant) alterations to the pattern, including adding an extra inch to the back seam, raising the waist and adding 1/2" to the shoulder seams. You don't want an uncomfortable corset, so pay attention to what the fabric is doing and adjust the pattern accordingly.
My mockup consists of two layers of muslin, a shoe lace, cheap lacing strips and large cable ties along the lacing edge (sandwiched between a fold along the front edge).


Like most people these days I had a very skewed idea as to where my natural waistline was and cut the mockup far too low as a result (even in the above photo it's still at least 1/2" too low in the back and sides).  If you are making a corset without integral/boned tabs the last thing you want is to have the bottom below your natural waist and digging into your hips and kidneys all day. It will hurt and you will be miserable.
This style of corset should end right below the rib cage.  It's not for waist reduction, it's for shaping and support...but the high waist and elongated front will give the impression of a smaller waist.
Again, see the above photo. I am very pear-shaped, but even without any boning the corset gives the impression of a narrow waist and long torso!

Now that your mockup is done, transfer any alterations onto your pattern and cut your fabric.
I used a top/outer layer of medium weight grey/blue linen, a middle layer of cotton/hemp twill and an inner layer of cotton/hemp "suede" fabric (which will be closest to the skin). 

Now, I should say right up front that this construction method might be totally ass-backwards. The pattern is a little light on directions --especially for a beginner-- so most of this process is either gleaned from reading other online dress diaries, inferred from completed garments, or a result of my own trial and error.  I'm not saying it's the best way to do it; it's just what I did...

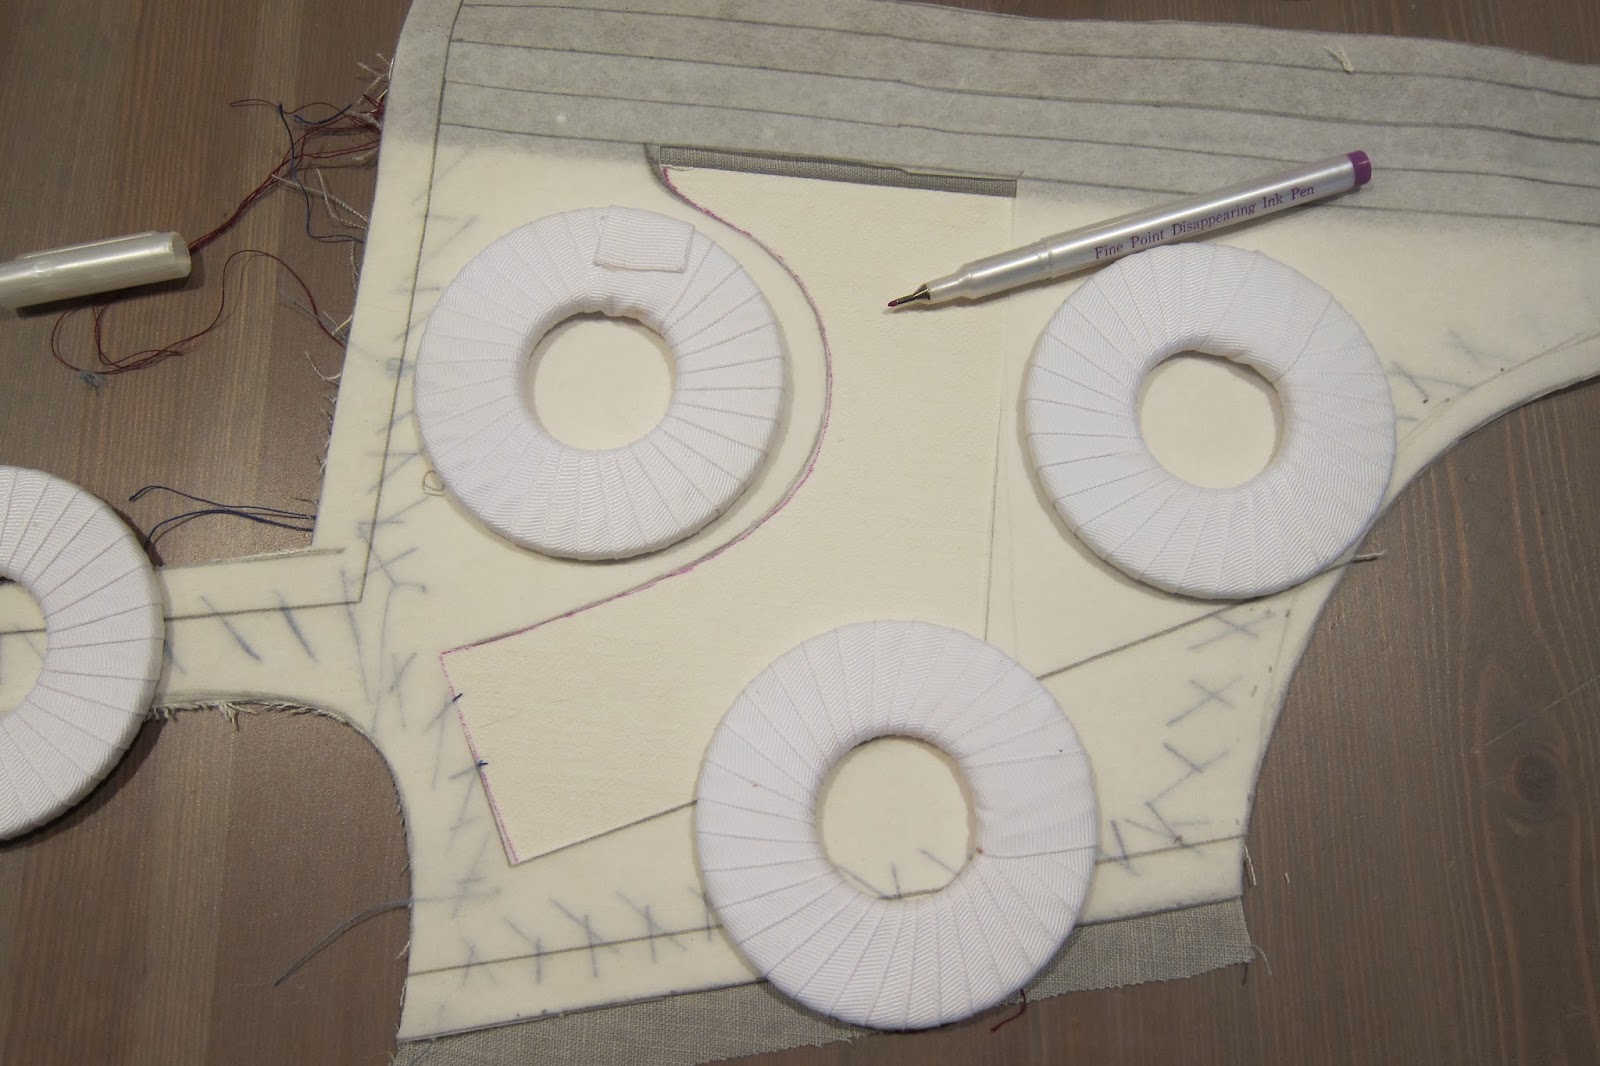
First I pad-stiched the two inner layers together (to prevent the fabric from shifting when the boning channels were sewn in).  In order to keep the two pieces lined up I found it easier to use a combination of fabric weights and "bulldog" clips rather than pins.


Then I treated the inners layers as a single piece and pad stitched the linen fabric on top of that.  As you can see the top fabric is also cut with additional seam allowances along joining edges. This will help with felling and finishing the seams later.


I cut the back as two pieces with 1" extra seam allowance along the back seam. This will allow for easier alterations in the future (if I gain or lose a significant amount of weight) but it can also be cut as a single piece if you prefer. 


Then I undid the stitches along the front edge, marked the fold for the lacing edge and then pressed the interior fabric. (Note: The front edges will no longer line up due to the fold, so if you don't remove the stitches the fabric will pull and pucker).


The top fabric is folded over and pinned into place. The linen has an additional 1" seam allowance along the lacing edge which will be felled down later (after all the boning channels have been completed). Then the first boning channels are stitched down in red silk thread on either side of the lacing strip. These channels are for the spring steel and they are the only ones which run the whole length of the front of the corset. A 3/4" gap is left between the two channels.  This is where the eyelets will be sewn in later.


Then I pulled out my pattern piece and cut a "window" for the boning pattern, placed it on top of the fabric and traced the outline with a vanishing Fabric Marker. I only cut out a small section (just enough to able to trace the cup pattern) so I would still be able to line up the bottom edge to the fabric and preserve the shape. After removing the pattern I used a ruler to continue the diagonal side line to the bottom edge.


Now it's time to start the boning channels!  These are sewn by machine with a strength stitch. I found it helpful to start and stop each channel just below the marking line.  Then I cut the thread with a long tail and sewed up to the mark by hand. The thread is then pulled towards the back, knotted off and buried.
The basting threads are removed as I go.
Also, be sure to iron your fabric as needed to ensure everything stays nice and flat as you sew the channels.
(Note: As you can see these are also slightly narrower than the channels next to the lacing edge since the whalebone is about 2mm narrower than the spring steel.)


Channels done! 
Now it's time to insert the bones.  I forgot to photograph this stage, but I cut the 'whalebone' to length and then smoothed the edges with sandpaper to prevent them from poking through the fabric.  The bones are inserted between the two foundation fabrics (not next to the fashion fabric). So staring from the layer closest to the body the order should be: Inner fabric. Boning. Middle fabric. Outside/top fabric...with the exception of the very first spring steel bone, which is sandwiched between the folded fabric along the front edge.

Only the front in boned.  The back and side channels are largely decorative and to keep the fabric smooth.
Pro Tip! The whalebone comes in a long spiral loop.  When you cut it will tend curve in the same direction it was curled, so make sure you alternate the directions of the curves as you insert the bones otherwise the bottom of the corset might flip outwards.  Or you can do what I did and insert most of the bones so that they curve towards the body.  I find this creates a pleasing "S" curve over the belly and keeps the front point facing down and towards the body (as best seen in the mockup photo). Basically don't insert all the bones so they curve away from the body, and especially not at the front point.
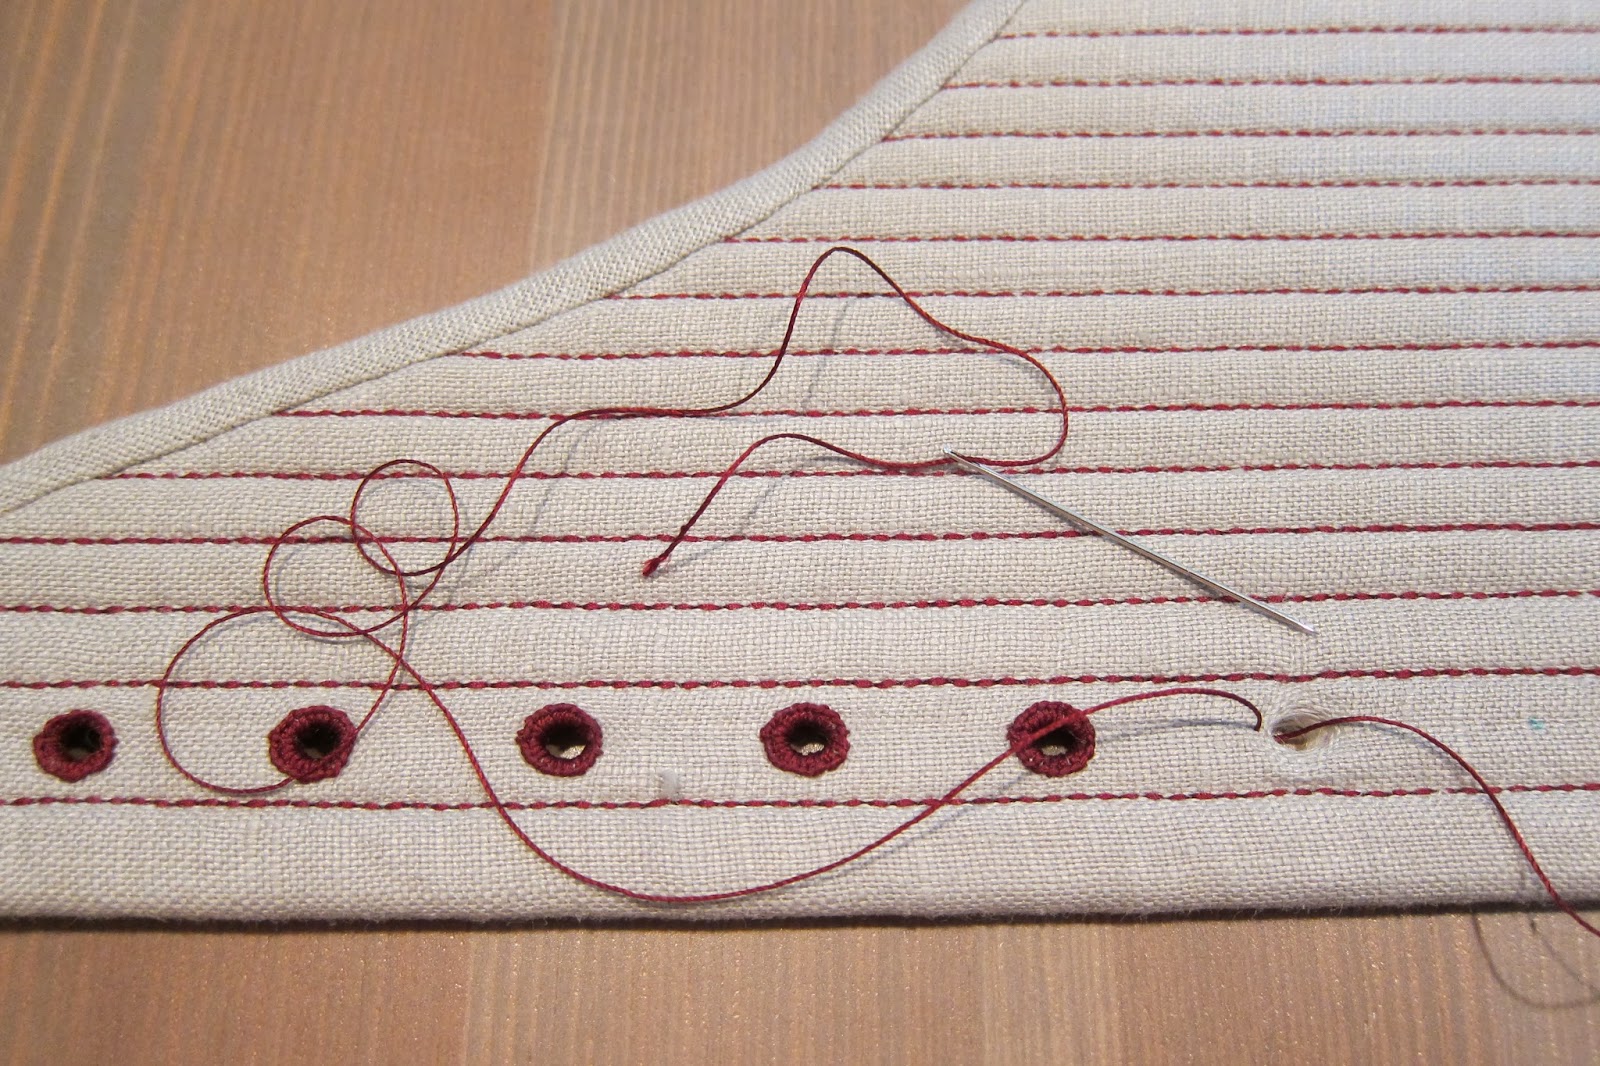


Then all the pieces were joined, the shoulder seams sewn together and a temporary lacing strip attached.  I tried on the corset one last time for fit and decided to take an additional 1/4" off the two back pieces (to better ease into the curve of the front pieces) before moving onto the finishing touches, which include....

Felling the interior seams! 
The interior seams are not trimmed.  Instead the additional 1/2" seam allowance on the top fabric is folded under the seams of the foundation fabric and then stitched down.


The pattern calls for stitching around the bust outline. I had originally intended to do this in the same red silk thread, but when I had the channels done I liked the effect of pattern emerging from the vertical lines and decided not to interrupt it.  Instead I chose a grey linen thread and prick stitched around the outline, with tiny stitches on the outside and larger ones on the inside. It's not a very strong stitch, but that shouldn't be a problem since the channels are sewn very tightly so the bones aren't likely to shift much.


With the seams felled and bust completed it's time to move onto the binding.
I found it easier at this stage to undo the shoulder seams and also to run some stitches around the outside top edge to keep all the layers together.


Then any frayed edges were trimmed, making for a nice clean edge.
For binding I used 3/4" bias tape (made with self fabric), with a 1/4" seam on the outside and 1/2" seam on the inside.

Bias tape pinned into place:


Sewn down:


Folded towards the back:


And stitched:


As to the shoulder seams...This step is not fully documented, but basically I bound around the arm hole on either side, stopping about 2" from the shoulder seam with the straps still unattached.  Then I sewed the shoulder straps together and felled down the seam allowances. The binding then meets up on either side of the seam allowance towards the back of the shoulder (to keep the bulk off of the top of the shoulder and collar bone).


Binding done!

The lacing strip is removed and now it's on to the eyelets.
This part scared the bejeezus out me since I had never tried spiral lacing before and I knew that if I screwed this up a lot of work would be going down the drain.
First off, anyone attempting this for the first time should definitely read The Zen of Spiral Lacing by Jen Thompson...it's an invaluable resource.
I decided to go with the second of the four options she outlines, which calls for an even number of off-set holes on either side of the lacing edge. The math worked out that my eyelets should be 7/8" apart.  I tried to measure this out on to the fabric at least a dozen times and never got the holes in the same place twice...
So I cut a piece of bristol board to length and then marked out the lacing holes, with the first hole at just over 3/8" and the rest at 7/8".  After triple checking that my measurements were right and that the holes would be evenly spaced I transferred the marks to the fabric, flipping the guide over on the opposite side so the 3/8" step was at the bottom (to ensure that the top and bottom holes line up).


Next is the scariest bit...poking the first hole.


After completing a few eyelets on one side, I switched to the other side and then partially laced the front to make sure the bottom eyelets would line up.  Then I finished the eyelets, working from the bottom up and alternating from side to side.  Even though I did several practice eyelets on scrap fabric I knew my technique would improve the more I did...alternating from side to side ensures that your nicest eyelets are all at the top (where they are more likely to be seen) and not all up one side.


Now, my eyelets are a little sloppy (working through so many layers of fabric was more difficult than I thought), but here's my method...
It's basically worked in a buttonhole stitch, but with a double thread.  I never know how to best anchor/start this kind of stitch, so I got around that this way:

First run a single thread through the hole, bringing it back up through the top fabric.


Then re-thread the loose end to create a double thread.


Thread the needle back through the hole, making sure to keep the other end even and taut.


Pull the thread through, creating a loop.


Then bring the needle up through the loop, next to the first stitch...


...and pull it through.


Thread the needle back through the hole, make another loop, bring the needle up next to the second stitch and repeat as needed, working your way around the hole until you come back to your original stitch.


Once you've finished the eyelet it's time to anchor and bury the thread.


Unthread the needle and make a single knot on the inside of the corset.


Re-thread the needle and pass it under a few stitches (if you like you can do this in several steps and pass it under the whole eyelet for extra strength)


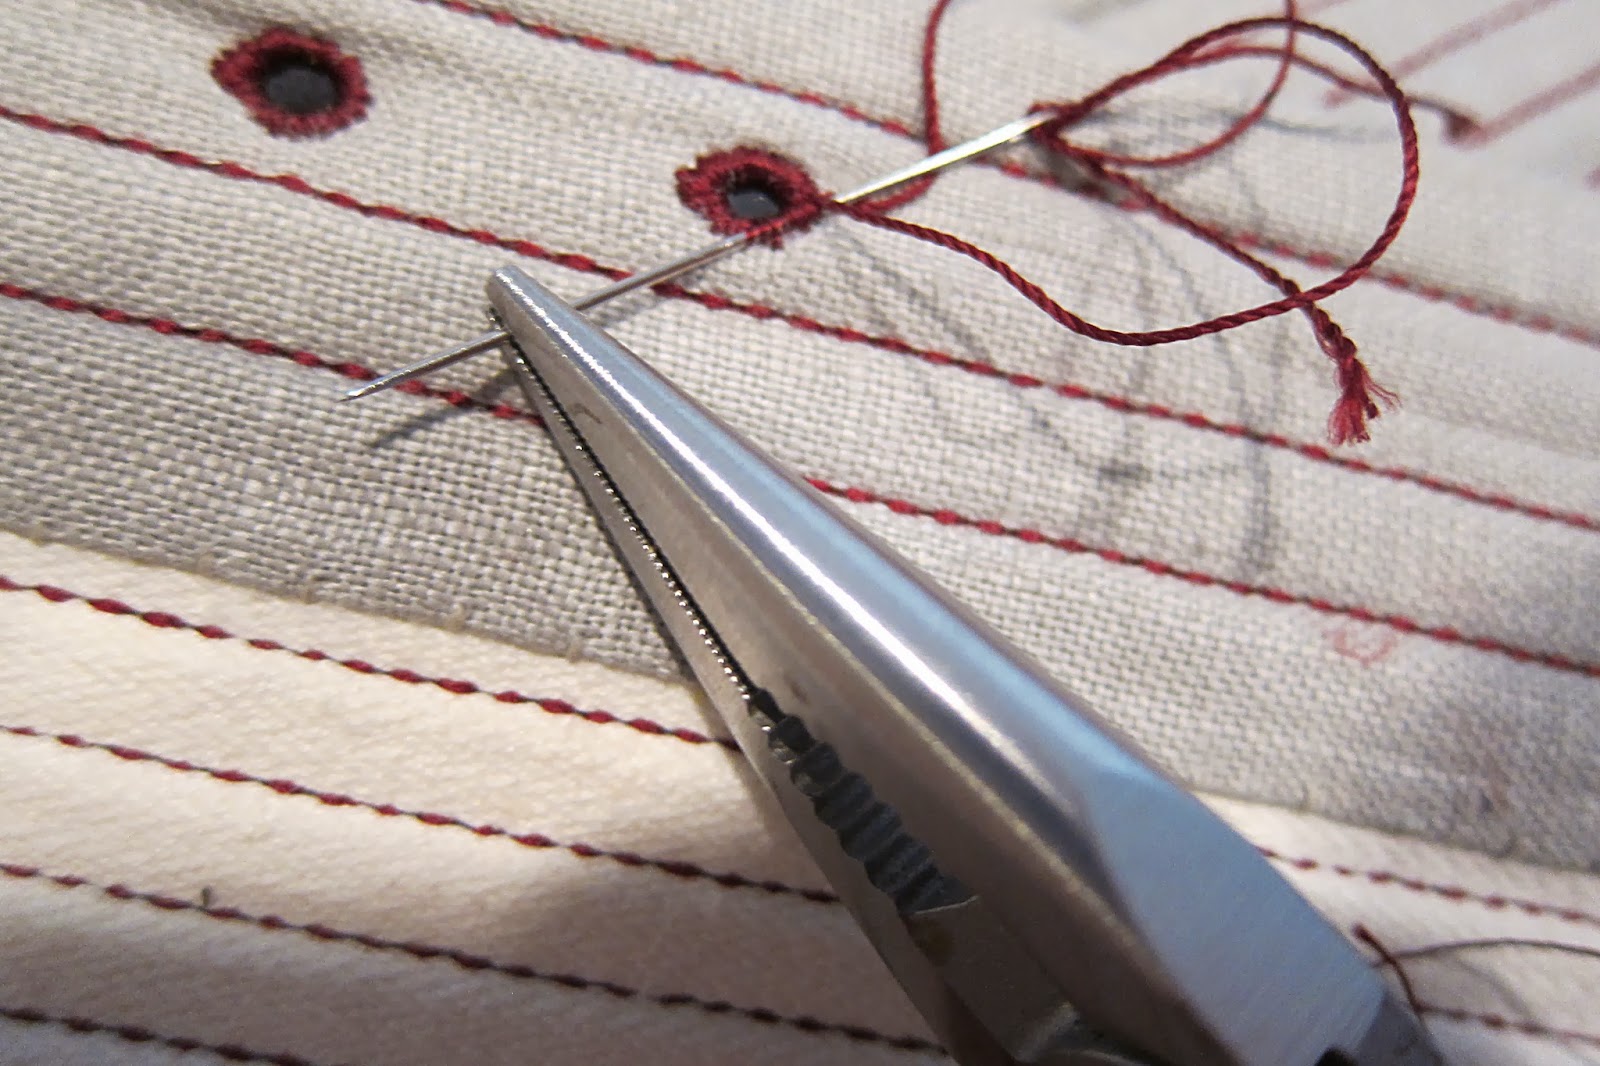
If you're sewing your eyelets after you've boned the corset you may need to use pliers...
(as the fabric will have much less flexibility)


Bury the thread, cut and you're done! 


And that's it! Corset compete!


Well....almost.  The corset will eventually have additional eyelets at the waist (on either side of the side seams) through which a ribbon will be run to attach the skirt.  But I'm holding off on this last step until the rest of the outfit is complete.


Resources & Materials

Pattern:  
-The Tudor Tailor (book and/or ready-made pattern)

Fabric:
-Grey/Blue "Judy" Linen (5.5oz) from Gray Line Linen
-Hemp/Cotton twill (10.5oz) and Hemp/Cotton "suede" (10.5oz)  from Hemp Traders
-Muslin for mockup (also from Hemp Traders, but any muslin should do)

Thread & Lacing:
-Red silk buttonhole thread (for channels and eyelets)
-Grey cotton thread for machine work
-Grey linen thread for hand sewing
-Narrow red suede ribbon

Boning:
-7mm Plastic coated spring steel bones (4) from Vena Cava Design
-5mm Synthetic whalebone (about 10 meters) also from Vena Cava Design

Other Supplies:
-Swedish pattern paper from Amazon. (This stuff is great! You can iron it!)
-Pattern weights
-Purple vanishing fabric marker
-Blue washable fabric marker
-Tapered tailor's awl
-3/4" Bias tape maker
-Eyelet tape 
-Small bulldog clips