
***

When in doubt, make a ruff!
I'm currently stuck between two half started (read: stalled) projects...and when faced with indecision I do what I always do: accessorize!!!
I've been thinking about tweaking another variation on my blue waistcoat (because why make new outfits when you can recycle old ones!) and was debating over whether to make a ruff or large-ish standing collar as the finishing piece. I had just about settled on a collar when I saw Samantha McCarty's amazing large-set ruff and decide to shameless ape the style!
A large, wide set ruff seemed much less frightening compared to a more traditional narrow one, and I figured if it all went south I could at least settle for the "messy" style that also seemed popular in the early part of the 17th century.


Any mistake or shortcuts below are mine...and there are a few of them!
Since ruffs are basically one long strip of fabric the set-up phase was pretty simple...I just cut 3 long strips of linen (selvage to selvage).
I wanted a finished ruff of about 3-3.5" wide, which means the strips had to be at least 4" (to account for the fabric taken up in the neckband). I cut slightly more than that (4.5") in case there was any fraying during the hemming processes and the fabric needed to be trimmed.
So I mark the fabric at 4.5" and then a thread is pulled. The fabric is 2.8oz fine linen from W.M Booth Draper and it pulls like a dream.

This creates a line that is perfectly on grain which can be used as a cutting guide.


This step is repeated twice more until I have 3 strips of fabric, each roughly 60" in length.
I originally tried to whip-stitch them together along the selvage edge, but it had frayed too much during pre-wash and trimming the loose threads just made it worse. So instead the selvages are cut away entirely and each strip is joined with a small felled seam.
First one edge of the strip is folded down by roughly 1/8" and the other by roughly 1/16".


Then the two strips are whipstitched together along the folded edge.

Then the wider edge is folded over the smaller edge and felled down.

Now I have a single strip of fabric approximately 180" long.

Now it's time to hem the whole length of fabric! I opt for a rolled hem...I try to keep it pretty neat and small, but it's not as tiny as I'd like since I'm worried the bulk at the felled seams will be tricky to roll if it's too narrow.


With hemming complete it's time to gather the ruff in preparation for attaching it to the neckband. Based on the extant examples in Pattern of Fashion it seems that a 1/4" cartridge pleat is pretty standard.
So I run a length of 1/4" stitches along the bottom of the strip, roughly 1/8" above the lower edge.
Also, I should note that before pleating fabric was trimmed down its final length of 3.75" (again by pulling a thread and using it as a guide). This means the final ruff will be 3.25" wide after it is attached to the neckband.

Next --using the first stitches as a guide-- two more rows of parallel stitches are made, with the final line of stitches being 1/2" above the bottom edge.

Now the fun part! The gathering threads are pulled, creating the pleats!

The pleats are stroked as they are pulled to create a neat, even line of standing folds.

And pleating complete! It's actually starting to look like a ruff!

It's at this point that I realize I've forgotten a crucial step. In order to properly set the ruff later it's vital to mark the exact centre of the fabric. It's much easier to do this before the fabric is gathered, since you can just fold the fabric in half...doing it after the fact involved much tedious measuring and re-measuring. But eventually the centre back located and it's marked with a small knot.

Then the pleats are spritzed with some spray starch to help them keep their shape when they are sewn to the neckband (make sure the starch is given plenty of time to dry)

The ruff is now ready to be attached to the neckband. Next a 4" strip of heavier linen (probably 5-6oz) is cut and folded in two. Then a 1/2" seam allowance is pressed down on either side. The final band is now 1.5" wide. The final length will be about 13.5", but for now there is at least 2" of excess fabric on either end (just in case).
This where I started to deviate from the instructions in a (quasi) big way, since they don't necessarily advocate for a very maths-heavy approach to this process. But I'm anal about symmetry, so I opt for math all the way!!!
First I divide the neckband into 16 equal sections...no problem. Dividing the ruffle on the other hand is trickier. The only way I can figure out how to do it is by counting pleats. Turns out I have 368 of them...which means at this stage I should have 16 sections comprising of 23 pleats each.

Each pleat is marked with a pin, which is then basted to the corresponding mark on the neck band.

One side of the ruff completed!


Then I try it on to make sure the neckband fits. Everything looks pretty good...and at this point it looks like a "messy" ruff will be doable even if all else fails!

Now it's time to repeat the earlier process on the other side of the band. But first the excess fabric is trimmed and a 1/2"seam allowance folded back on each side.


The ends of the band will eventually be whip-stiched together, but for now they are left open so that the gathering thread can still be pulled if needed.

Now here is where things get a bit bonkers...At this point I should have just finished sewing down the pleats by eyeballing them, but instead I decide to half each of the 16 sections again and divide the pleats accordingly. Because I am a crazy person.
Now that the ruff is basically basted together that makes this process a little harder, but here is how I got all my stitches to line up:
First I took a stitch in place at the mark on the neckband.

Then a stitch is made just above the gathering thread on the desired pleat.

The pleat is pulled down to the neckband (so that the gathering thread is just hidden within the band) and another stitch taken in place to secure the pleat.

Now here is the totally non-period bit...
The thread is then passed through the neckband to the next mark, where another stitch is taken in place and the whole process is repeated.

With the pleats finally divided to my liking a final pass made on and each pleat is stitched to the neckband. This is repeated on both sides.


Then a row of back-stitches is made just below the edge of the band (on the inner side) to really anchor the pleats in place.

Finally the gathering threads are tied off and cut, and front edges whipped together (which I completely forgot to take a photo of!)
And that's it! Ruff complete! Isn't it BEA-U-TIFUL!!!!
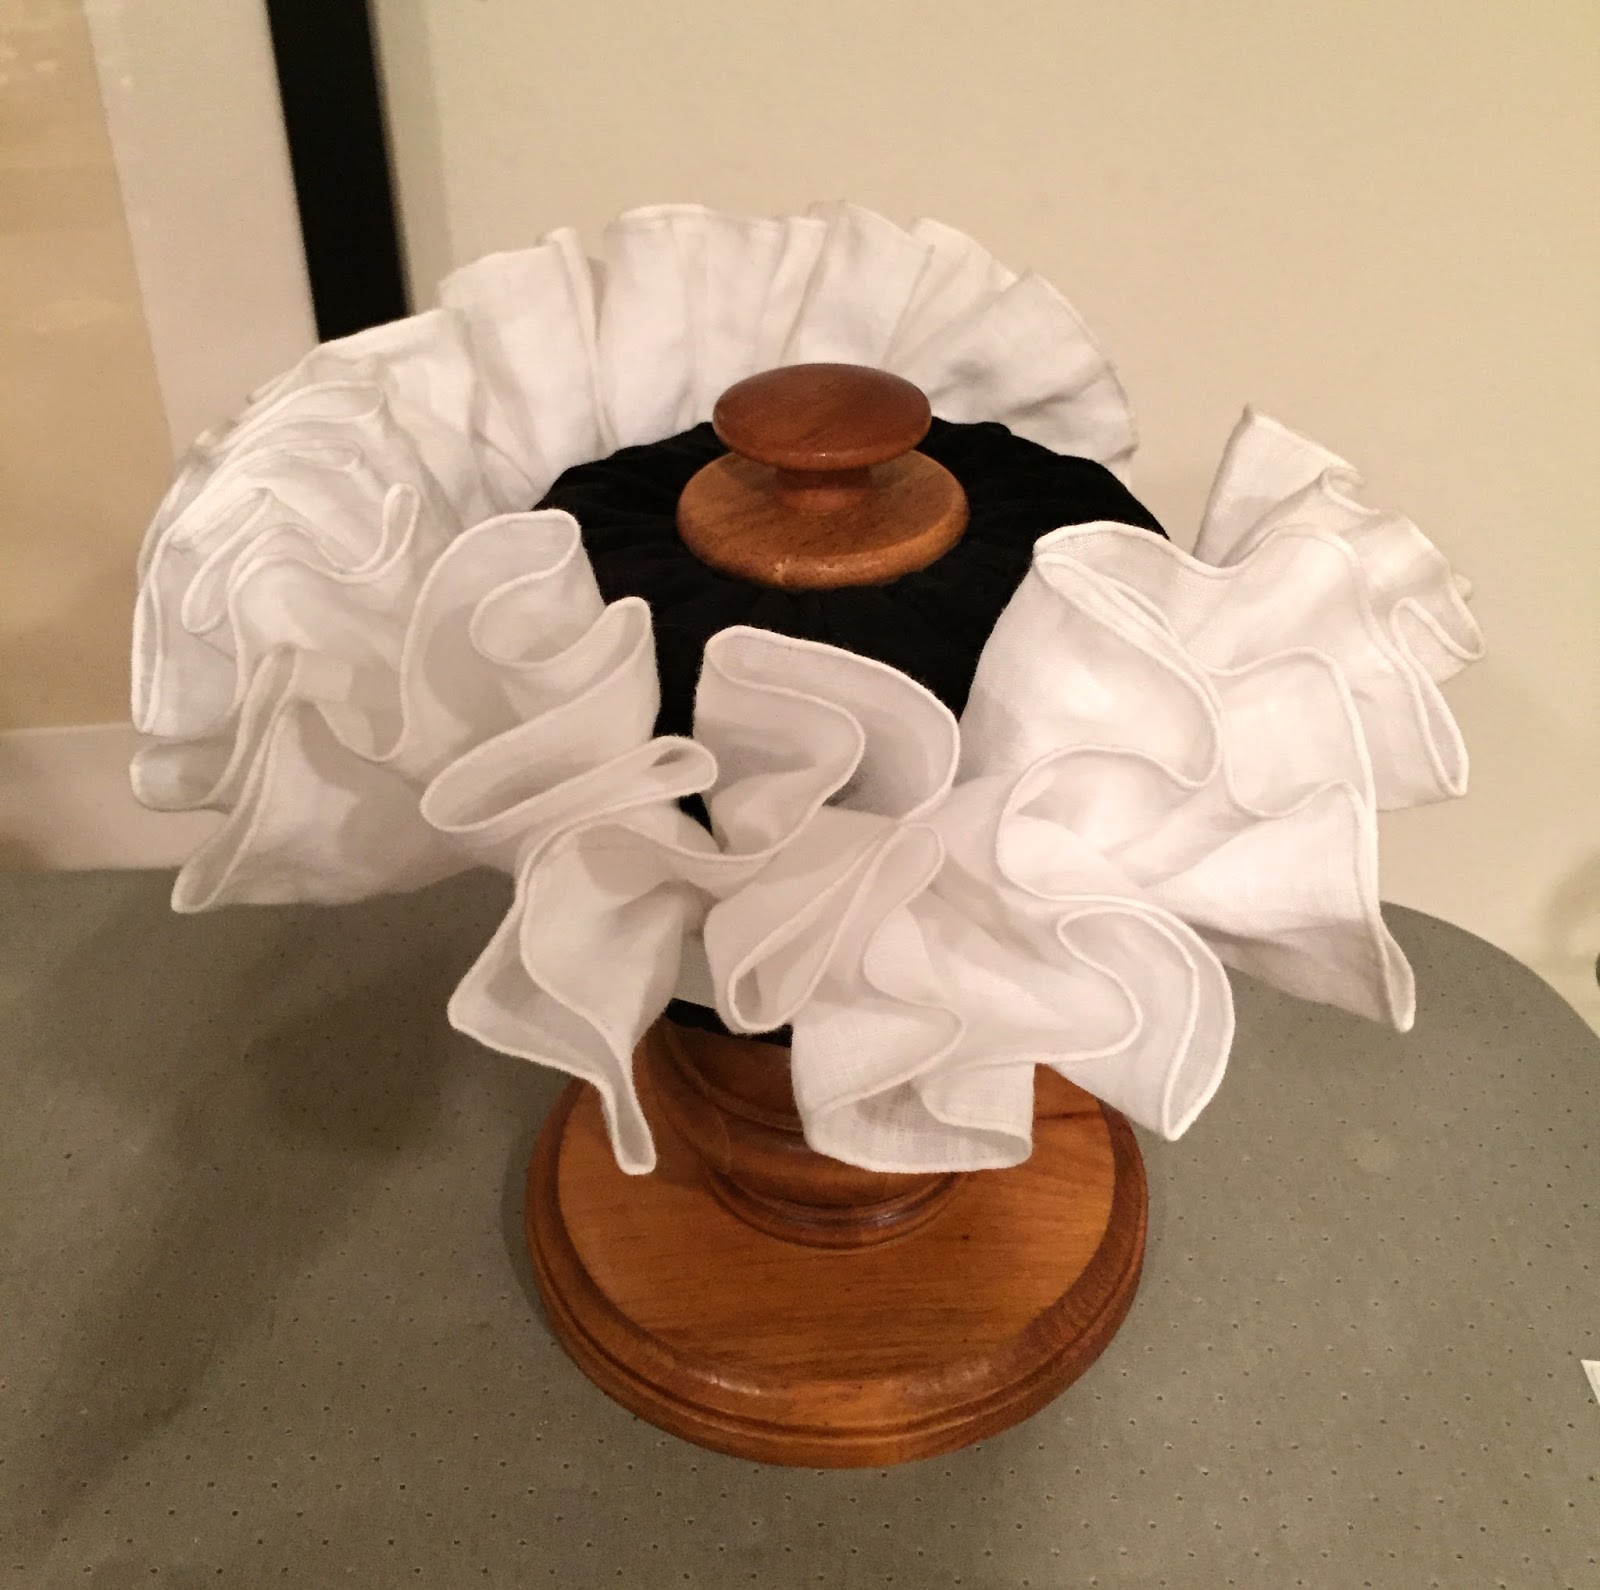
Now it's time to set the darn thing...
First the gathers are coaxed into roughly the right shape (I'm aiming for large sets, at least 2" wide)

The the sets are pinned into place.

The ruff is then sprayed with starch (as opposed to boiled, as the instructions reccomend...because I am lazy). A curling iron and hair dryer are used to set the starch and round the figure-eights. This process is repeated 3 times over the course of the next few days.


And that's it! The ruff is starched at set!


It's then turned upside-down while not being worn to keep in from sagging (make gravity work for you! Take that, physics!!!)

Lastly, you may notice that there are no closures on the ruff. There should be (probably a buttonholes worked on either end of the opening) but I was worried about cocking up the whole thing at this point and so I decided to make a partlet to mount the ruff to instead!
The partlet is made of the same linen as the ruff. The pieces are shaped (as opposed to rectangular) so that there is no gathering around the neck, with two eyelets --worked with a buttonhole stitch-- on either side of the neckband.

The neckband on the partlet is slightly larger than that of the ruff so that it can be pinned or basted to the inside of the band, just behind the eyelets.

Two eyelets are also worked into the back of the band so that linen tape can be basted to the centre back of the ruff and then tied to the partlet itself.

And there you have it! My super poufy, face-eating, Late Period ruff...OF DOOM!


***
Resources & Materials
Pattern:
-Aforementioned Guild of St. George instructions
Fabric:
-2.8oz white linen from W.M Booth Draper
-Medium weight white linen (between 5-6oz) from B.Black & Sons
Thread & Lacing:
-White cotton thread
-White silk buttonhole thread
-Heavy poly thread (for gathering)
-Linen tape from TiedtoHistory
Other Supplies:
-Heavy spray starch
-Large curling iron
-Hair dryer
-Ruff Stand by Woodsholme Handworks
-Purple vanishing fabric marker
-Tapered tailor's awl


